Speeding up Android Studio
I’ve been using Android Studio for about a year now, adopting it early to get a jump on things. And in that time, I’ve certainly had my share of frustrations with it, but it’s going to be a superior tool to ADT when it comes out of beta, so it’s worth it to use it now.
Here’s a few tips I’d like to share with you if you do plan on using it.
The Command/Control-E Menu
I use many IDE’s, from XCode to Sublime Text to Android Studio, and I use each one differently when it comes to file navigation. In XCode, for example, I tend to toggle the “Recent Files” option a lot so that the Project Navigator is only displaying the files I’m mucking with at that moment. In Android Studio, though, I use the Command-E menu.
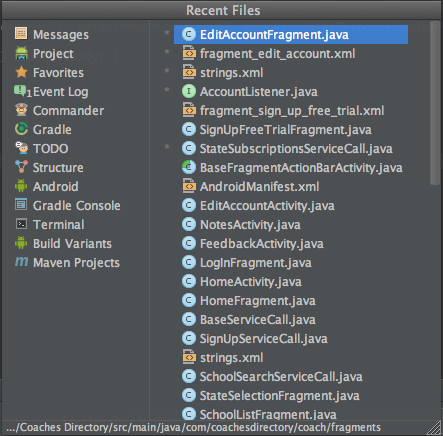
Open up a bunch of files in Android Studio and then press Command-E (Control-E on inferior OS’s). You’ll see something like this:
You’ll see two columns. On the right are your most recently opened files, in descending order. You instantly have keyboard access so you can arrow up or down and press Enter to open the file you want. This is extremely handy and the optimal way to move between files in Android Studio I think.
As a bonus, on the left you’ll see a list of views you can open. This is also very useful for navigating around the IDE itself, but I encourage learning the individual keyboard shortcuts for them as that’ll be faster. Start with Command-6!
And before we continue on, you might be asking why not just navigate using the tabs? You can do that, yes. However, I find it slower, especially with a mouse. Even with the keyboard, it’s a three-key combo by default. The Command-E popup really is the fastest way to navigate…give it a try!
Avoid the Wizards
Android Studio improves on ADT when it comes to wizards that create activities, resources files, etc. for you. They are more detailed and provide more options. There’s only one problem: you shouldn’t use them.
Well, that’s not totally true. Sometimes I use a couple of them early on in a project, but I still suggest to avoid them after that. Why? Well, several reasons:
- You should be creating a lot more fragments.
- You shouldn’t be creating many activities that actually do anything.
- You can’t avoid creating menu XML for each activity.
- It’s faster not to.
Do you put all your logic in activities? You really shouldn’t. For the most part, you should be creating “shell” activities that do nothing but host a fragment for your phone-form views (or multiple fragments for your table-form views). This leaves near-empty activities in your code and, rightfully, puts that code in fragment-land!
So, why not use the wizard? Well, the wizard wants to create activities for you, not fragments, and that’s wrong. So what I’ll do when creating a new screen is to clone a previous screen from the bottom-up:
- Copy and paste the fragment XML from a similar screen. (Enter new filename.)
- Change the XML to match my screen requirements.
- Copy and paste the fragment class from that screen. (Enter new filename.)
- Change the code and handlers for my screen requirements.
- Copy and paste the activity class from that screen. (Enter new filename.)
- Direct that class to load your new fragment.
- Add the activity to the AndroidManifest.xml. (Or crash!)
A bunch of steps, but it’s many times faster than using an activity creation wizard. Plus, you’ll have to create your fragment yourself and re-jigger everything anyway. If you’re like me, you have a base activity that simply loads a fragment and your fragment logic always looks similar. Same for resource files.
Copy and paste is your friend…well…this time!
Genymotion
There’s no argument. You must be using Genymotion for Android development. Why? Oh, well for one thing you won’t have to wait around for an hour for your simulator to load, and you DO need simulators to test on various devices so don’t tell me to just use a device…plus, it’s nice not having a phone wired to your computer all the time, and Genymotion runs so fast and smooth and, yes, yes, I know there’s that Intel thing to make the real simulator faster and that works (after an hour of trying!) but you still have all the other problems like when you run the app and the simulator comes up and it never runs your app because it’s freakin’ disconnected and it sometimes takes forever for the app to run anyway and WHY THE HELL CAN’T GOOGLE GET THEIR SIMULATOR RIGHT ANYWAY!!!?!?!!
OK, let me breathe.
Alright, so yeah, use Genymotion. It’s not only a way better environment than Google could ever provide, but it’s super simple to install, too! (Which you wouldn’t expect from a “virtual” environment.) All you need to do is install Virtual Box (hell, you don’t even need to run in, just install it) and then install Genymotion. You’ll be shown how to create your virtual device and…oh man, it’s just so easy. Android Studio sees Genymotion as just another device like the simulator or your Nexus. It’s awesome.
And to make launching Genymotion easier right from Android Studio, there’s even a plugin.
This isn’t even a recommendation. Go get it. Stop arguing.
Download Everything
This one doesn’t really just apply to Android Studio, but I’m including it here anyway.
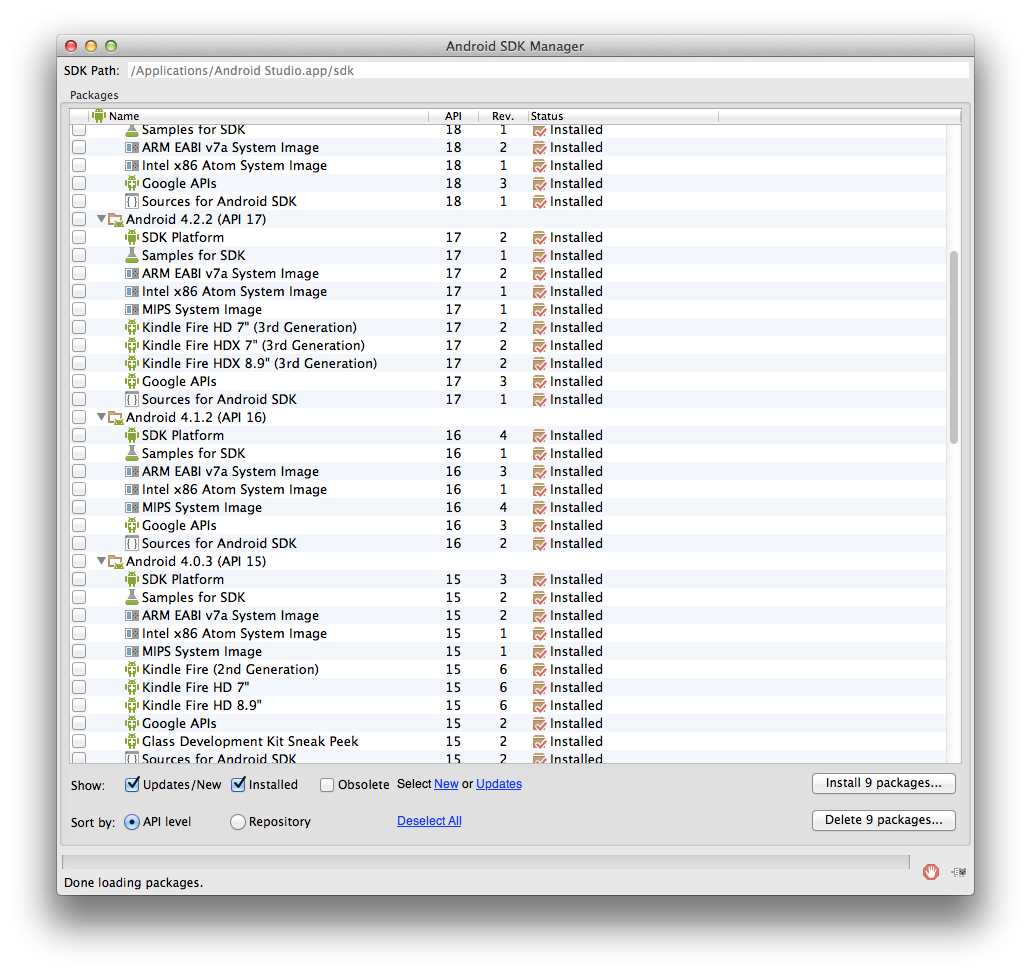
Download everything Google offers you. Every SDK. Every bit of sample code. Everything. Do you only use SDK 10 and the latest stuff? Whatever…just download everything!
There’s a lot of reasons for this. For one, you’ll open existing projects that will fail because they use a different SDK. You will inevitably be testing against different devices in the future. Have you considered Kindle? So, when you install Android Studio and need to download what you need to use it, do yourself a favor and just get it all now. It won’t take that long and it’ll be way better than stopping multiple times later.
DOWNLOAD ALL THE THINGS!!!
How to Create a Flappy Bird Clone with SpriteKit in 20 Minutes Getting the Charles Debugging Proxy to Work with iOS


 I've been writing mobile apps professionally for 10 years: Blackberry, Java, ME, iPhone, Android. I've gotten dozens of apps into the various App Stores for dozens of clients, big and small.
Comments are currently closed.